Master precision soldering: Top 10 tip & tricks
Mastering soldering is crucial for anyone involved in electronics.
Whether you’re a hobbyist or a professional, knowing the right techniques and tips can make all the difference in achieving durable and reliable connections. This guide covers ten essential tips and tricks to perfect your soldering skills, from choosing the right soldering iron to ensuring proper cooling of the joints.
1. Use the right soldering iron
Selecting a suitable soldering iron is crucial. For most electronics work, a temperature between 350°C and 400°C is ideal. Non-temperature-controlled irons (10W-25W) minimize damage risks for heat-sensitive components or PCB tracks, but they are less reliable and may not be effective for all soldering operations. They should be unplugged when not in use to preserve tips.
Opt for temperature-controlled irons (40W-60W) for precise control and tip protection, which offer fast temperature recovery. Ensure the iron has a 3-pin cord for grounding, which is essential for static-sensitive components like CMOS ICs and MOSFETs. Quality irons with ceramic cores provide superior thermal recovery and faster heating despite lower wattage. Avoid poor-quality wire coil irons, which lose heat quickly and recover slowly, forcing higher heat settings that can damage components. Butane torch or battery-type irons are suitable only for portability.
Proper temperature control prevents overheating components and ensures efficient solder flow. Here is a chart for different soldering operations with their corresponding temperature and wattage:
| Soldering operation | Temperature (°C) | Wattage (W) |
|---|---|---|
| Fine electronics (e.g., SMD components) | 250-300 | 15-25 |
| General electronics | 300-350 | 20-40 |
| Wire soldering | 350-400 | 25-60 |
| Heavy-duty soldering (e.g., Soldering heavy gauge wires, large connectors) | 400-450 | 60-100 |
| Soldering large components | 350-400 | 40-80 |
| Desoldering | 300-400 | 30-80 |

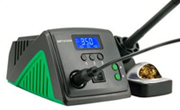
Figure 1: MULTICOMP PRO MP740055 soldering iron (Source)
2. Select quality solder
60/40 and 63/37 Sn/Pb solders are common in electronics, with melting points between 361-376°F. The 63/37 solder solidifies quickly, reducing the risk of bad connections from movement during the plastic phase. This improves soldering quality, particularly for less experienced users, with only a negligible cost difference from 60/40.
Lead-based solders are preferred for their lower melting points and ease of use, though they face environmental concerns. On the other hand, lead-free solders, often tin silver, require higher melting points and stronger fluxes for comparable performance. For critical applications like aerospace, there's concern about tin whiskers forming with lead-free solder.
Selecting the suitable solder wire diameter is also crucial for optimal performance. A diameter between 1.5mm and 0.5mm or less is ideal for electronics. Larger diameters can result in excess solder and difficulties in tight PCBs, while smaller ones may hinder solder flow and joint quality. Finally, flux core solder simplifies activation and flow during soldering, enhancing efficiency. A solid wire solder that needs a separate flux application is less convenient unless specific flux requirements dictate otherwise.
Here's a chart that matches different types of solder wires to specific requirements or application areas:
| Solder type | Composition | Melting point (°F) approx | Applications | Advantages | Considerations |
|---|---|---|---|---|---|
| 60/40 Sn/Pb | 60% Tin, 40% Lead | 361-376 | General electronics, PCB assembly | Easy to work with, good flow | Environmental concerns |
| 63/37 Sn/Pb | 63% Tin, 37% Lead | 361 | Precision electronics, fine pitch work | Quick solidification, high-quality joints | Ecological concerns, slightly higher cost |
| Lead-free | Tin-Silver, Tin-Copper | 217-422 | Consumer electronics, environmentally friendly applications | Reduced health risks, compliant with regulations | Higher melting point requires active flux |
| Silver solder | Silver-tin | 221-482 | High-frequency applications, low-resistance connections | Low resistance, strong joints | Higher cost, higher melting point |
| Water-soluble flux | Various | 429 | High-reliability applications, post-solder cleaning | Easy to clean, active flux | Must be cleaned to prevent corrosion |
| Rosin core flux | Various | 445 | General electronics, rework and repair | Good for manual soldering, easy to use | Residue can be corrosive if not cleaned |

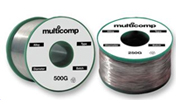
Figure 2: WELLER T0051387499 solder wire (Source)
To learn more details about solder wires, click here.
3. Choose the right soldering tip
Selecting the appropriate solder tip size is critical for effective soldering. A small tip won't transfer sufficient heat, leading to weak joints and inefficiency. Conversely, a large tip can cause overheating, potentially damaging pads, components, and circuit boards. Ensure the tip shape and size match the contact pad to maximize the contact surface area, allowing for rapid heating of leads and pads.
Using a tip that is too large increases the heat volume, slows heat recovery, and risks interference with adjacent components. A tip that is too small won't provide adequate contact area for efficient heat transfer, resulting in longer dwell times and increased thermal stress on components. Choose the right tip based on your job requirements from common types such as Needle, Conical, Beveled, Chisel, Hoof, and Knife. Here is a chart for your reference:
| Soldering iron tip | Applications |
|---|---|
| Needle – I Series | Narrow pitch soldering and detailed work |
| Conical – (B Series) | Working in confined spaces between components, for a narrow pitch with tall ICs around, wire connector applications |
| Beveled – (C-series) | For drag soldering across the fine-pitch pins on a PCB to solder an entire row quickly, Surface mount devices (SMD) |
| Chisel (D-series) | Soldering thick wires, broader surface mount components, large connectors, and onboard connections, even desoldering |
| Hoof point (E-series) | Soldering small gauge wires, drag soldering, bigger components, power connectors, and high thermal demand joints |
| Knife (K-series) | Drag and point soldering, rework, pad cleaning and fixing soldering bridges. |

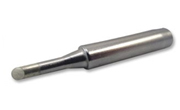
Figure 3: Different types of soldering tips (Source)
To learn more details about soldering tips, click here.
4. Tin the tip – Clean the tip
Keep your soldering tip clean and tinned to extend its life and ensure solid connections. To do this, heat the tip, add a bit of solder, and wipe it with a wet sponge to leave a thin solder layer. This helps with heat transfer, prevents oxidation, and reduces the time needed to apply heat to components.
A clean soldering tip is crucial for efficient soldering. Dirt and oxidation can mess with heat transfer, leading to weak joints. Clean the tip with a wet sponge or special cleaning curls to avoid residue build-up after each use. Using a good-quality soldering iron with electronic temperature control helps manage the sudden heat loss from using a wet sponge to activate the heating element. This keeps the iron ready for quick heat transfer when you touch the tip to your work, ensuring fast, even heat for a solid connection.

Figure 4: Cleaning and tinning the soldering tip (Source)
5. Always use flux
Flux plays a vital role in soldering by preparing conductor surfaces, removing oxidation, and ensuring they remain oxide-free. It ensures proper wetting and facilitates smooth solder flow. Choosing the appropriate flux and applying it correctly is critical for successful solder joints.
Fluxes vary in activity and solubility, impacting their ability to cleanse device terminals and PCB pads of contaminants. The solubility of flux determines the cleaning method required after soldering. While active fluxes effectively remove oxides, they can be corrosive if not thoroughly cleaned. Environmental regulations have spurred the adoption of low activity fluxes, often "no-wash" types, which minimize the need for post-solder cleaning but may affect solder-wetting properties.
Ensuring device terminals are clean and adequately plated is essential for achieving optimal soldering results with low activity fluxes. Rosin, derived from organic acids in pine trees or synthetically produced, is the most common flux for hand-soldering electronic components. Avoid using "Acid" fluxes, which contain strong acids unsuitable for electronics assembly.
6. Useful tools that make the difference
Soldering requires more than just a good iron. The right tools can significantly improve your work quality. Essential tools include:
- Miniature needle-nose pliers and side cutters: Crucial for manipulating and trimming wires.
- Wire strippers: Ensure clean connections.
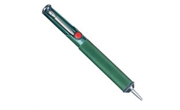
- Desoldering pump: Helps remove excess solder for clean rework.
- Lamp with a magnifying glass: Provides better visibility
- Vise or circuit board holder: Stabilizes your work.
- 'Third hand' device: Offers extra support.
- Heat sink clips: Protect sensitive components from heat damage.
Using these tools together enhances your soldering precision, efficiency, and overall quality. Stability is key for precise soldering and prevents cold joints caused by movement during the process. Here is a chart of necessary tools for different soldering operations:
| Tool | Applications |
|---|---|
| Miniature needle-nose pliers | Used for precise manipulation of wires and components, making it easier to position them correctly. |
| Miniature side cutters | Essential for trimming excess wire and leads, ensuring a clean and tidy soldering job. |
| Wire strippers | It is necessary to remove insulation from wires to expose the conductor for soldering. |
| Desoldering pump | Helps remove excess solder from joints, crucial for rework and correction. |
| Lamp with a magnifying glass | Provides better visibility and magnification, allowing for more precise soldering, especially on small components. |
| Vise or circuit board holder | Stabilizes the workpiece, freeing up both hands for more accurate soldering. |
| Third hand device | Offers extra support by holding components or wires in place, improving precision and ease. |
| Heat sink clips | Protect sensitive components from heat damage by absorbing and dissipating excess heat during soldering. |

Figure 5: Soldering tools and accessories from MULTICOMP PRO MP740850 soldering station (Source)
7. Use proper soldering techniques and solder components in the correct order
To consistently achieve quality solder joints, follow these techniques:
- Use minimal heat: Avoid PCB damage by just using enough heat.
- Ensure surfaces are clean and fluxed: Clean surfaces and apply flux for better solder adhesion.
- Heat pads and leads simultaneously: Before applying the solder, heat the pad and the lead together.
- Preheat for a few seconds: These steps help prevent cold joints.
- Feed the solder smoothly: Using just enough solder to coat the joint.
- Keep the iron moving: This avoids overheating.
- Allow joints to cool thoroughly: Let each joint cool before moving the board.
- Inspect all joints under magnification: Check all joints to ensure quality.
When soldering multilayer boards, follow this order:

This sequence ensures larger components don’t affect smaller, sensitive ones. Proper technique and order come with practice but prevent many issues upfront.
8. Use the right amount of solder
To achieve smooth and shiny joints, use the right amount of solder. Avoid using too much or too little. Proper soldering forms a good fillet without blobs, ensuring strong connections. Excess solder hides poor joints, while insufficient solder results in weak connections.
Ensure the solder covers the pad and lead without gaps, revealing the lead's outline to confirm a proper bond. Whether tinning wires or soldering components, the solder should adhere well without concealing the wires or leads.

Figure 6: Images of using a) minimum amount of solder, b) optimal, and c) excessive solder (Source)
9. Allow proper cooling
Proper cooling of soldering joints after soldering is crucial for ensuring strong, reliable connections. When a solder joint is heated, the metal components and solder are molten, forming a bond between the materials. Allowing the joint to cool naturally and undisturbed is essential for the integrity of the connection.
If the solder joint is moved or disturbed during the cooling process, it can lead to a "cold joint." Cold joints are characterized by a dull, crinkly appearance and often result in weak mechanical strength and poor electrical conductivity. These joints are more prone to failure and can lead to intermittent or complete loss of connection, which is particularly problematic in critical electronic applications.
Proper cooling ensures the solder solidifies correctly, forming a smooth, shiny, and robust joint. It also helps prevent thermal stress on the components and the PCB, which can occur if the joint is cooled too rapidly, such as by blowing on it or using cooling sprays.
10. Inspect and test the joints
Inspecting and testing soldering joints are vital steps in electronics assembly because issues can arise despite best efforts. Address these common defects promptly:
- Cold joint: Insufficient heat leads to weak bonds. Reheat and add solder too
- Dry joint: No solder adhesion. Apply flux and reheat before adding the solder.
- Bridge: Occurs when excess solder shorts pads or pins. Carefully wick away the excess solder.
- Overheated joint: Characterized by burnt flux or charred pads. Allow the joint to cool before retrying.
- Icicle: Conical solder shape caused by premature movement. Hold the joint steady until it hardens.
- Insufficient wetting: Incomplete pad coverage. Reflow the joint with added flux.
Electrical continuity tests are essential to confirm that all connections are functioning. Additionally, mechanical strength tests ensure that the joints can withstand stress and won't fail under pressure.

Figure 7: Different types of soldering disputes (Source)
Conclusion
These ten tips and tricks will significantly enhance your soldering proficiency, leading to more robust, reliable joints and successful electronic projects. Perfect soldering is using the right tools, techniques, and patience. Applying these best practices ensures your soldering work meets the highest standards, minimizing defects and maximizing performance.
